Setup and calibration
About the screenshots
The screenshots in this manual show the desktop version of the WebUI, where the controls are displayed more clearly with less scrolling. You can also use the WebUI on a smartphone, but its layout may differ from the screenshots shown here.
The screenshots were taken using a USB connection. When you connect over Wi-Fi, the connection indicators may look different.
Check the electronics and open the WebUI
Check that all cables are correctly seated and oriented. Connect the power supply to the DC socket on the Generic Board to power up the MIDIfy system.
The LEDs on the sensorboards should flash rapidly for five seconds, then change to a running-light pattern.
On your computer, tablet or smartphone, connect to the Wi-Fi network created by the MIDIfy system:
- Network name: MIDIfy
- Password: midify617388
On a phone or tablet with mobile data, you must switch mobile data off before opening the WebUI.
Once connected to the MIDIfy Wi-Fi network and with mobile data switched off, open a web browser and go to http://192.168.4.1 to open the MIDIfy WebUI.
Check the system status
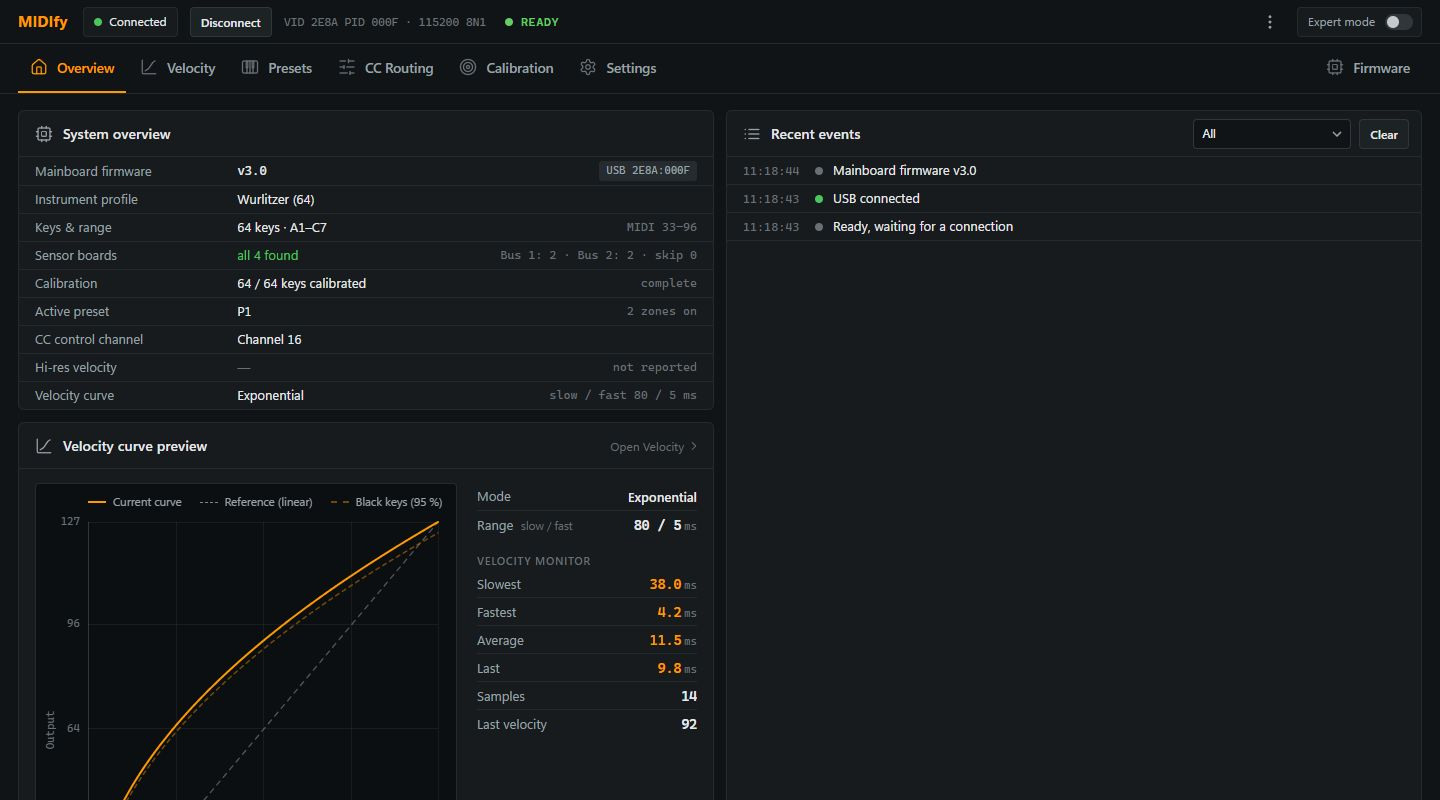
When the system is ready, check both indicators in the overview:
- The status in the top bar should read READY.
- Under Sensor boards, all boards required for your instrument should be found. The expected number depends on the instrument.
If both indicators match, the initial electronics check is complete.
Start the pre-calibration wizard
Open the Calibration tab, select Installation and click Start Rail Pre-Calibration Wizard. Although the button refers to a rail, on the Wurlitzer this procedure is used to adjust the height of the directly mounted sensorboards.
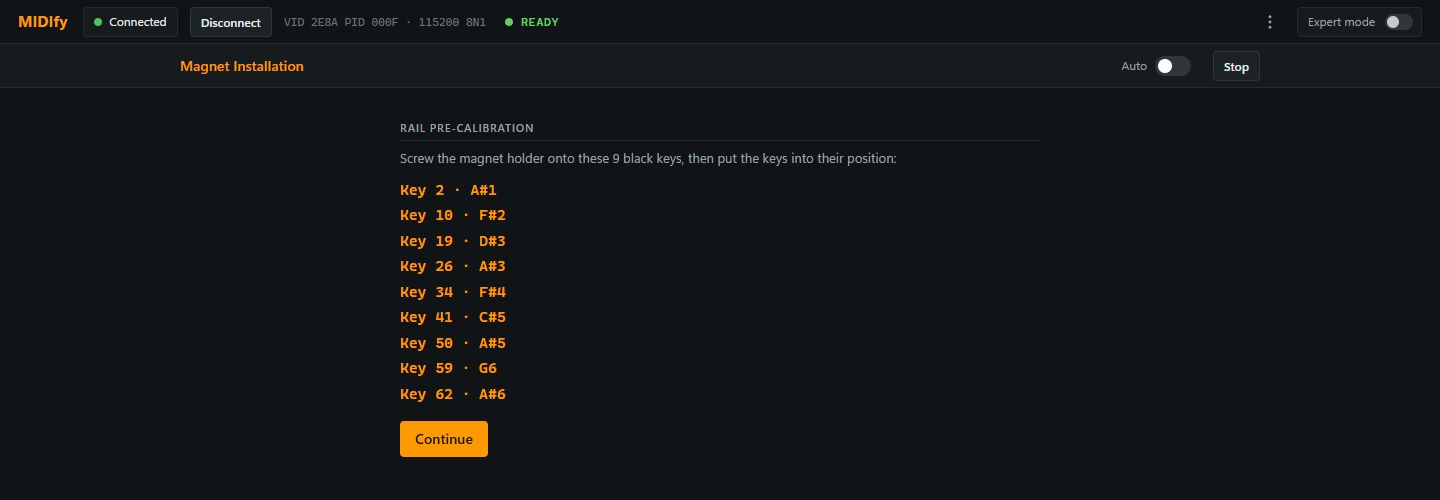
Prepare the reference keys
Fit magnets to the reference keys requested by the wizard. The selection depends on the instrument profile. These keys are used to set the sensorboard height across the keyboard before calibrating every key.
Mark the magnet holder mounting position
Place the magnet holder marking jig on the sensorboard with the marking screw tips pointing upwards. Locate the jig using its two preinstalled M3 countersunk screws. Choose two available holes that do not conflict with the screws already securing the sensorboard.
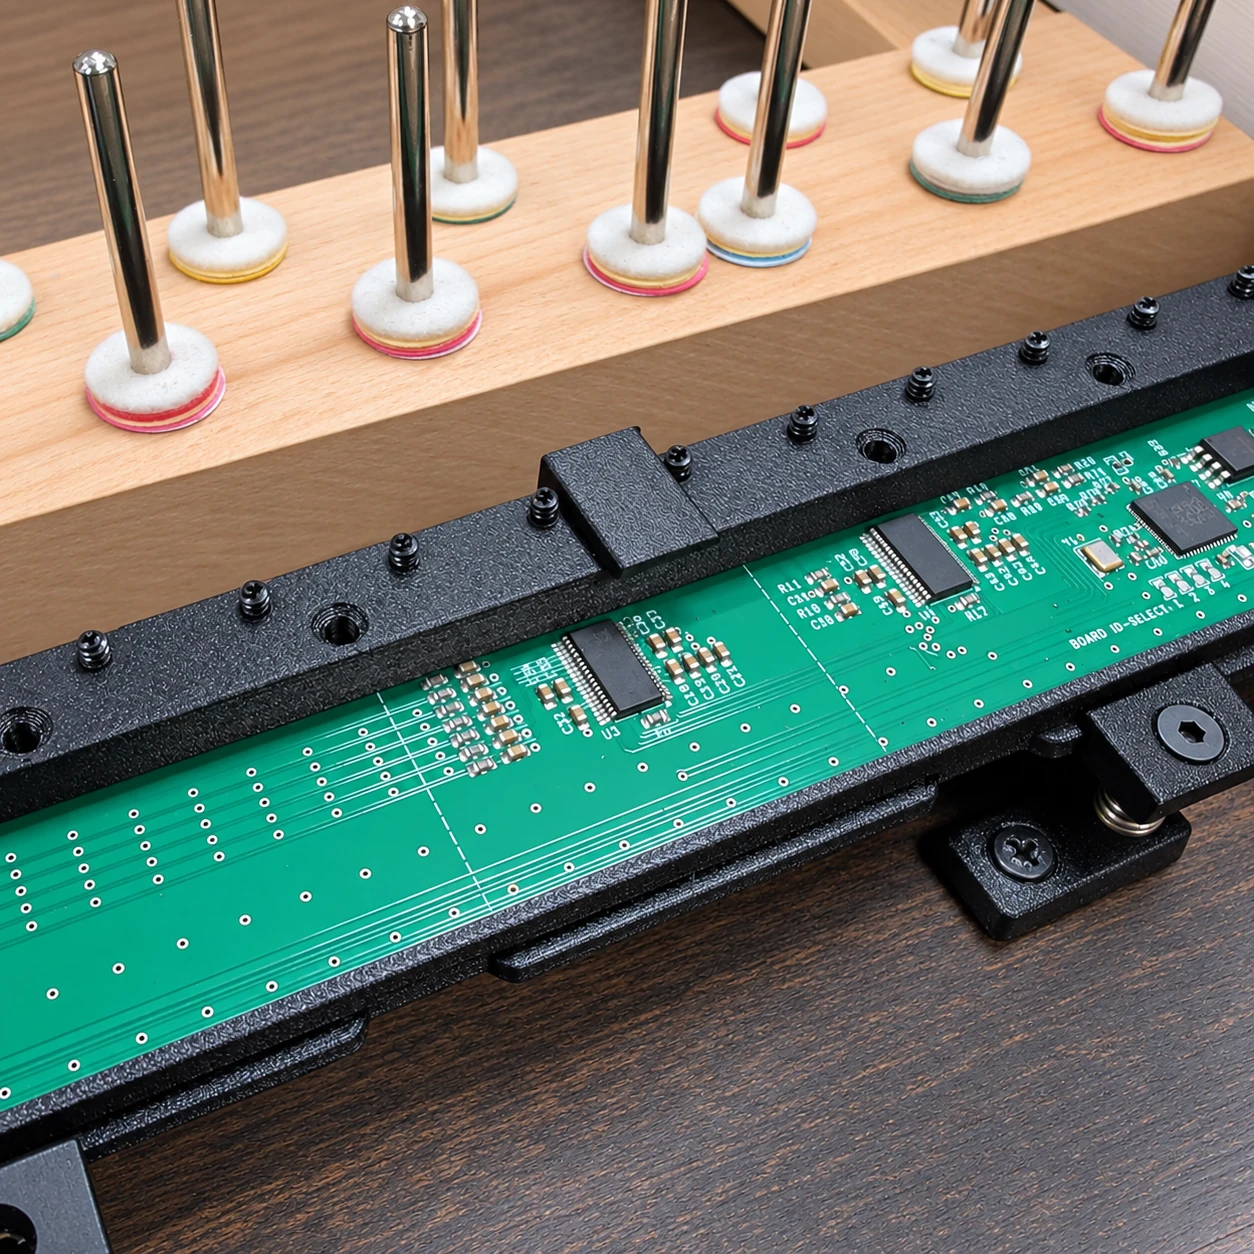
Work on one sensorboard at a time. Mark only the keys belonging to the board on which the jig is positioned.
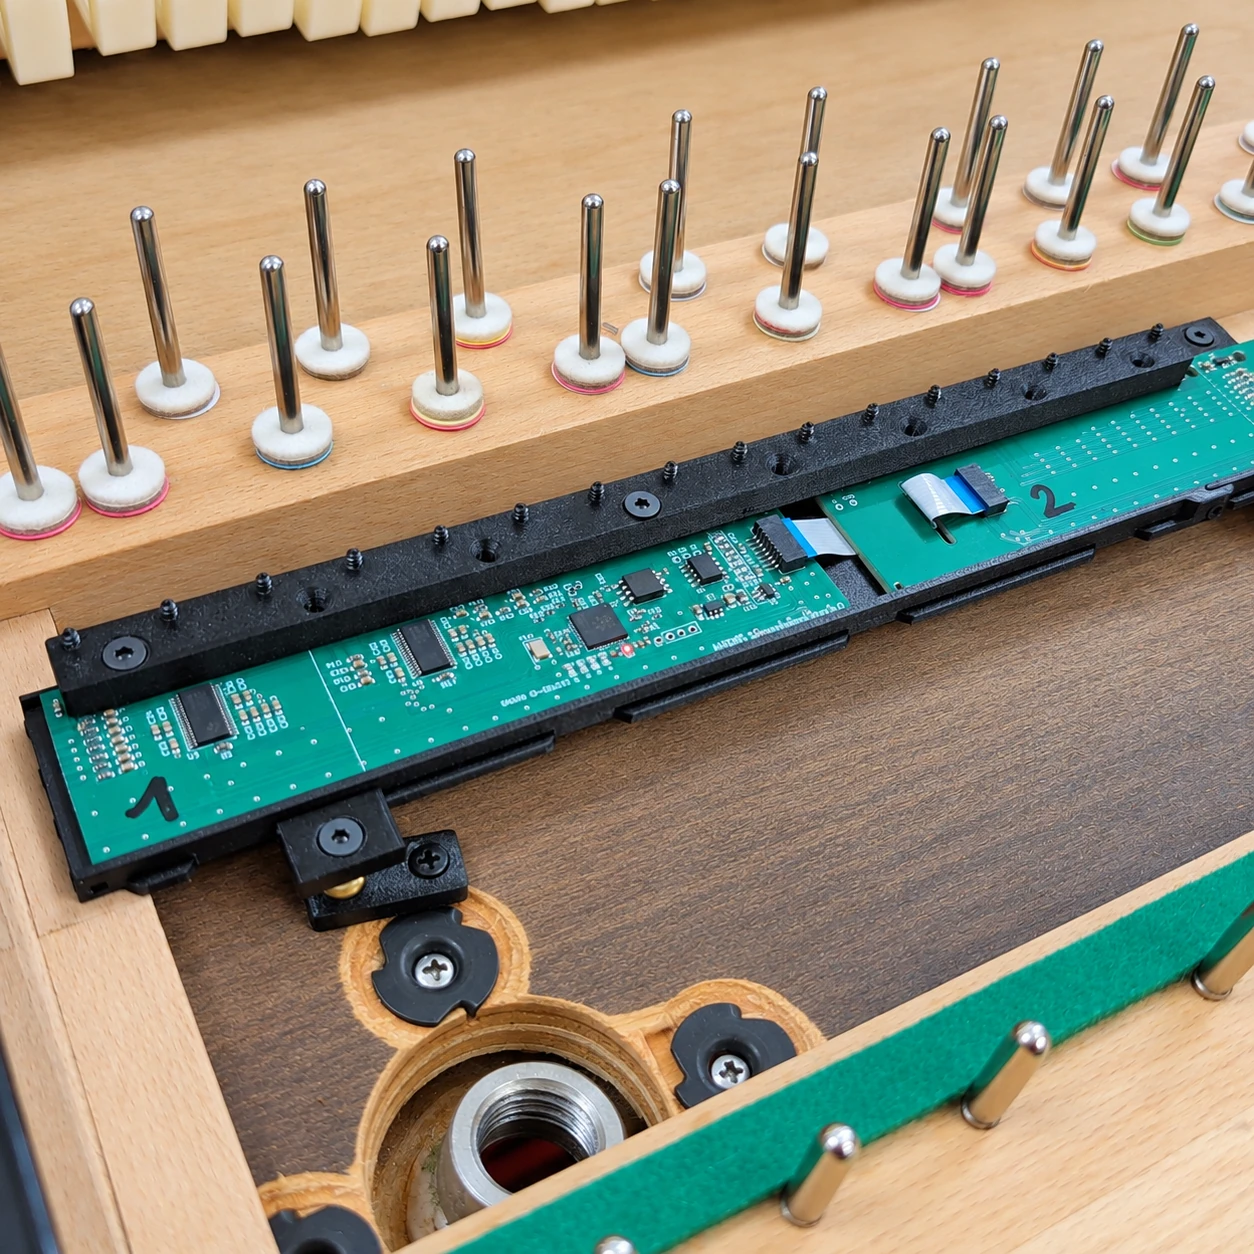
Before marking keys on the next sensorboard, move the jig onto that board and align it with the board’s first sensor. A full-length sensorboard has 16 key positions. For now, mark only the selected reference keys; the same procedure can later be used for the remaining keys.
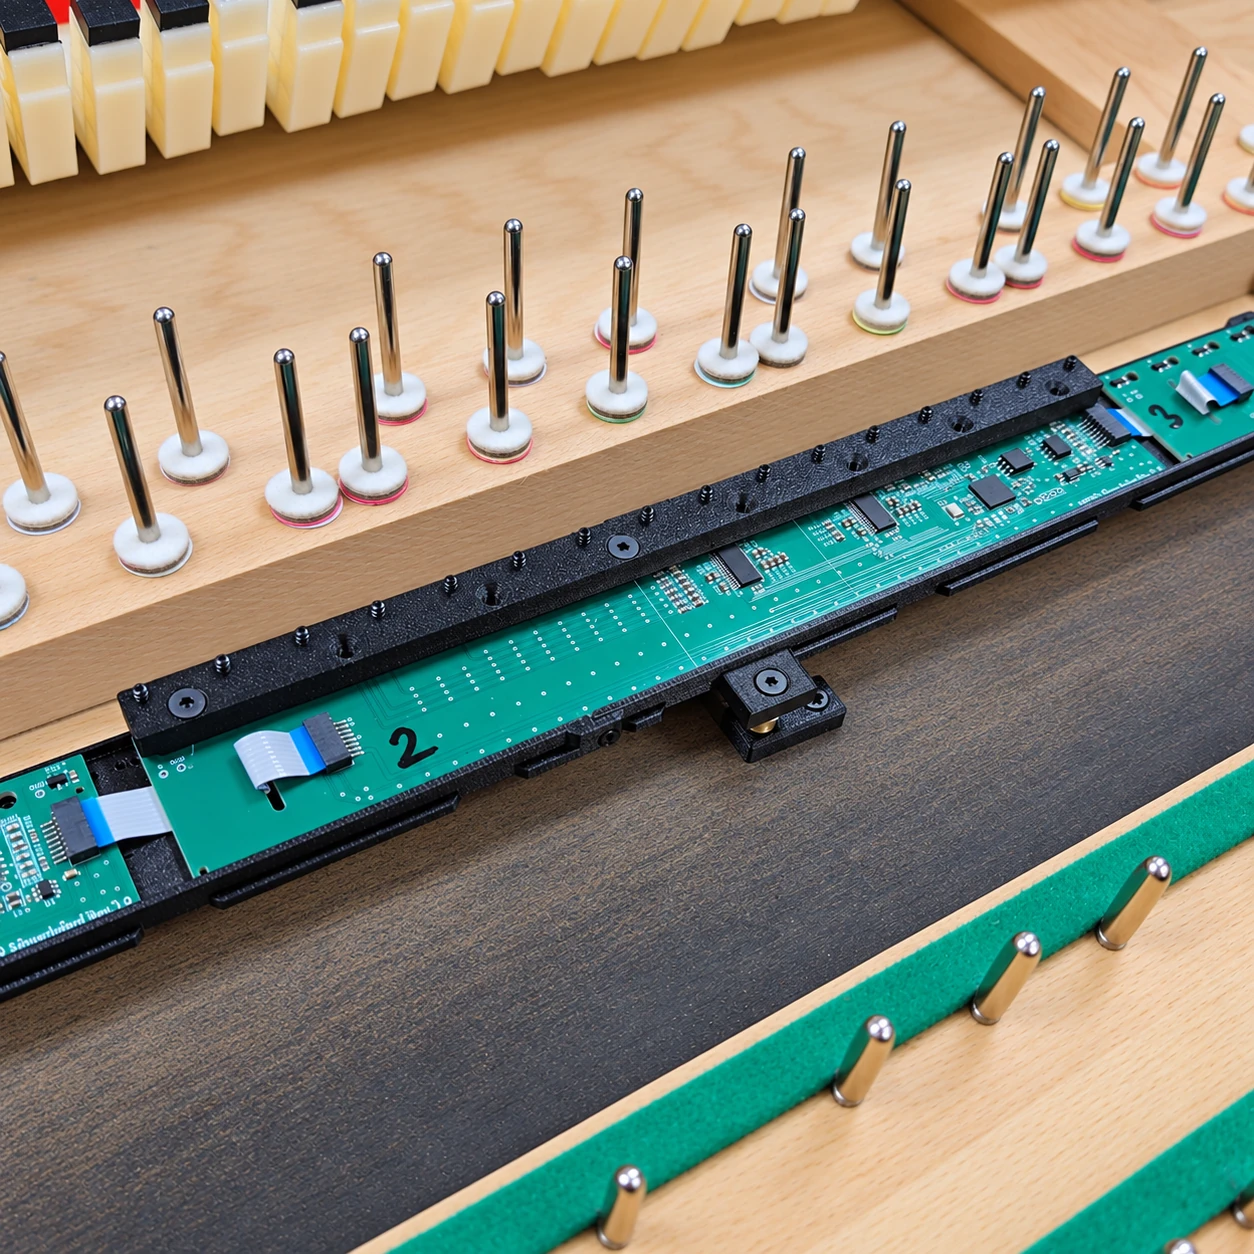
Insert the reference key in its normal position and press it down gently onto the jig to make a small indentation on the underside of the key.
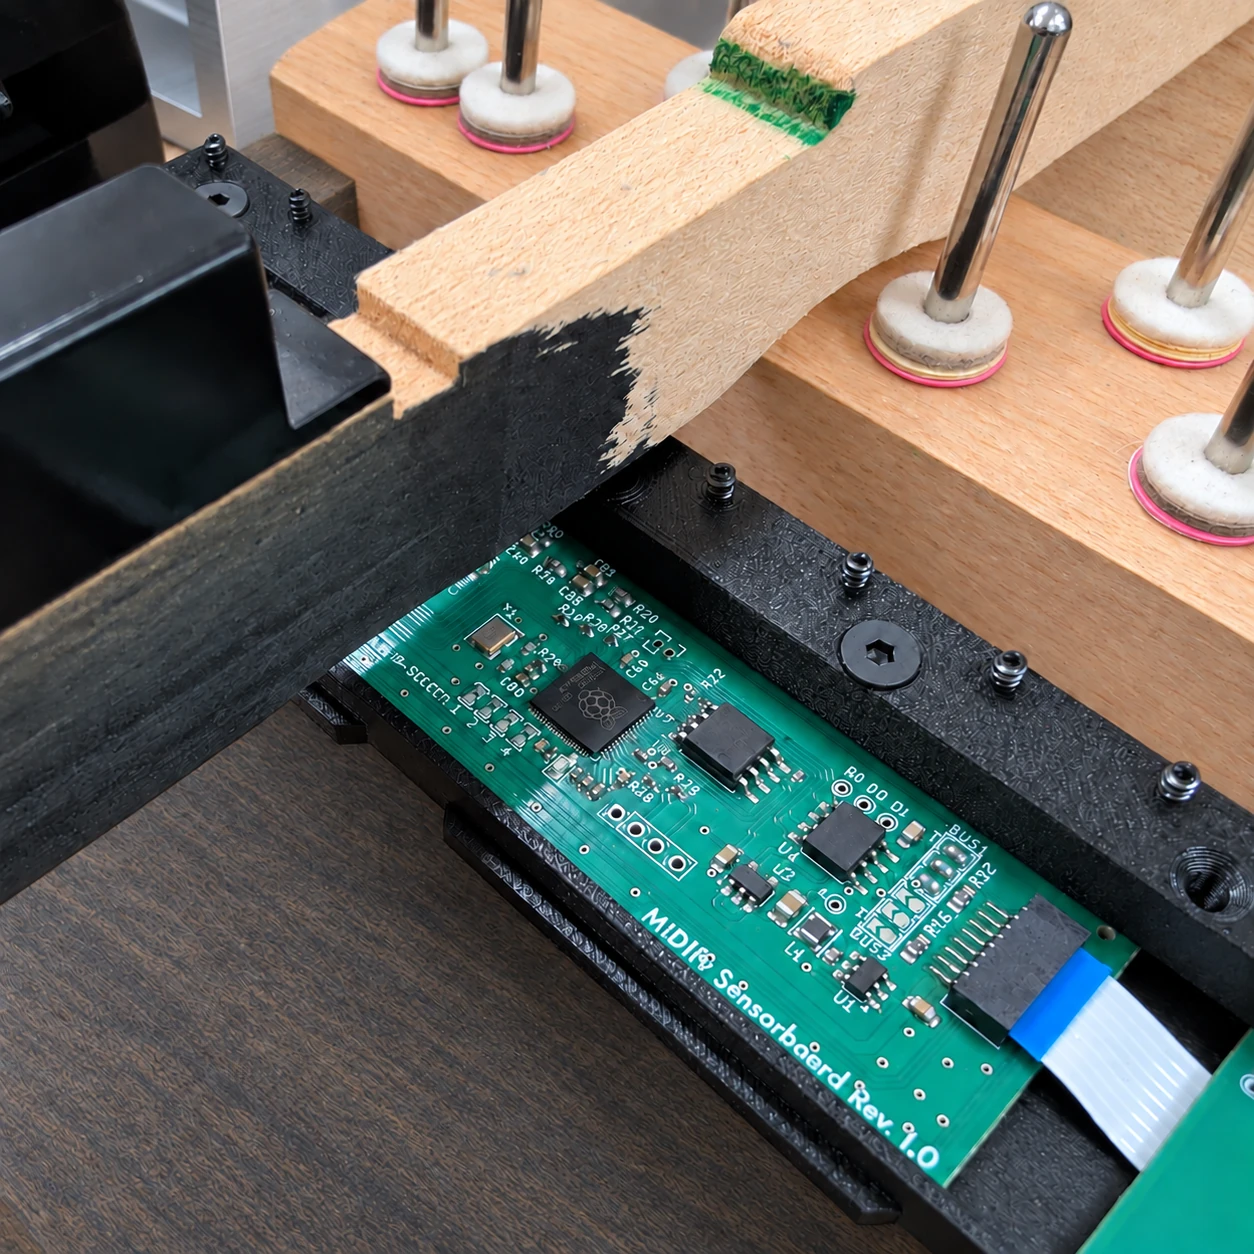
Remove the key and locate the small indentation. This marks the mounting screw position for the magnet holder, not the position of the magnet itself.
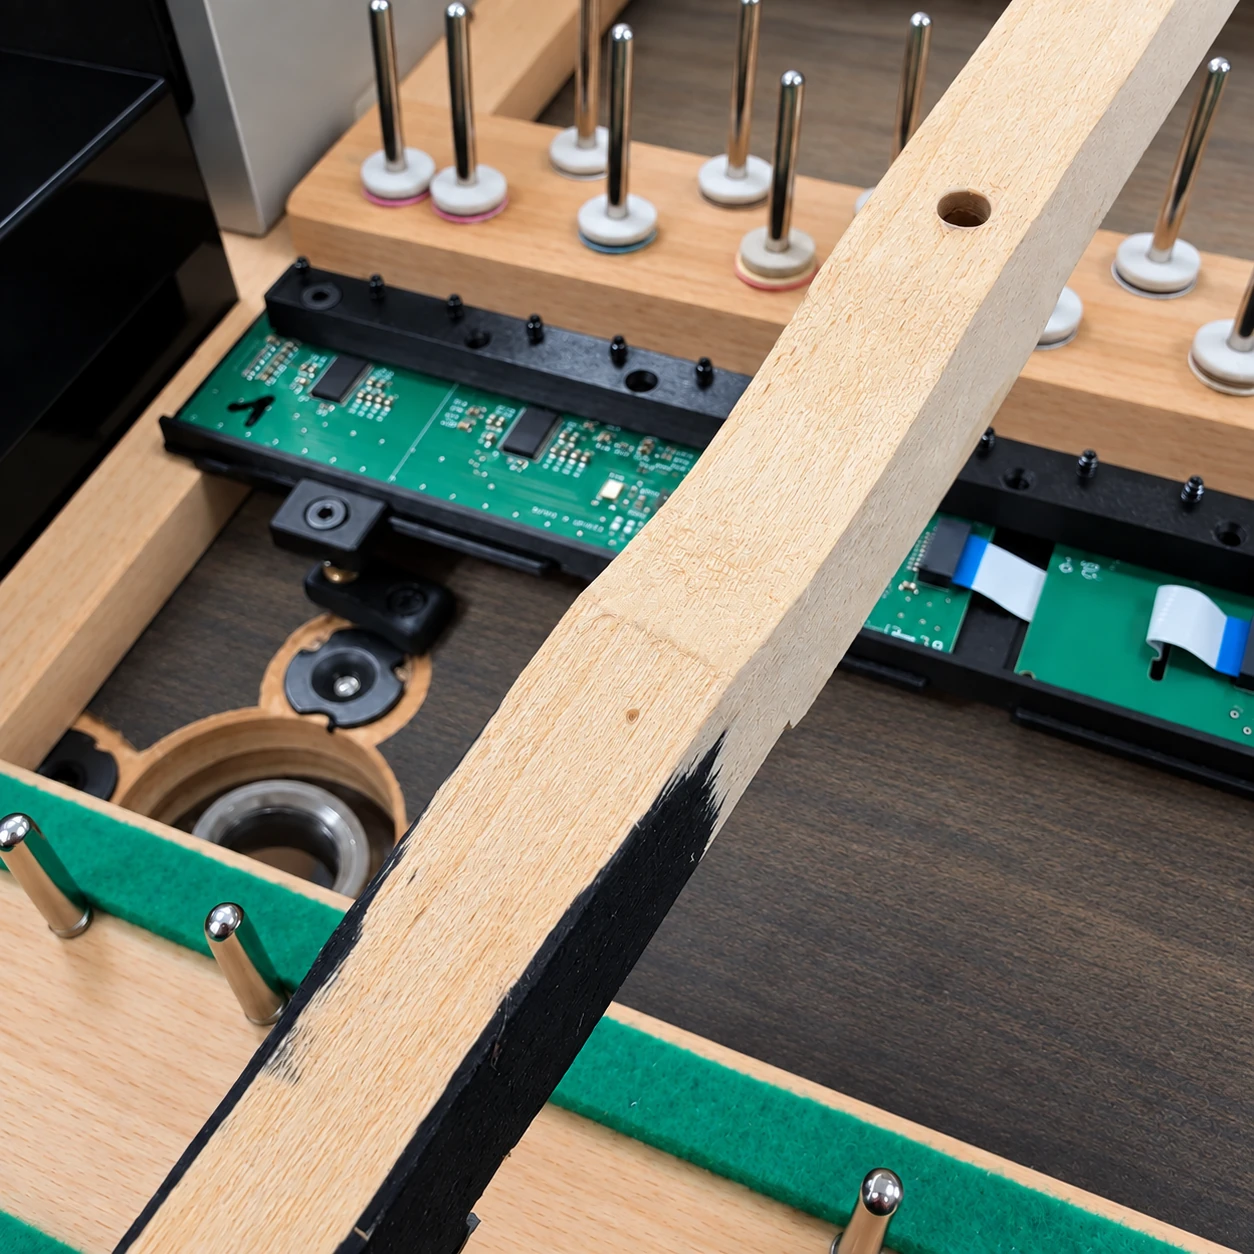
If the indentation is difficult to see, colour the screw tip with a marker and press the key onto it again to transfer the mark.
Mount the reference magnet holder
With the key removed, we recommend pre-drilling a 1.5 mm pilot hole at the marked position.
Use a black magnet holder for each black reference key and a white holder for each white reference key. Insert a 2.3 × 12 mm countersunk screw through the holder and screw it into the marked position on the underside of the key.
If you ever need to insert a magnet into a holder, make sure its south pole faces the sensor. This applies to both black and white magnet holders.
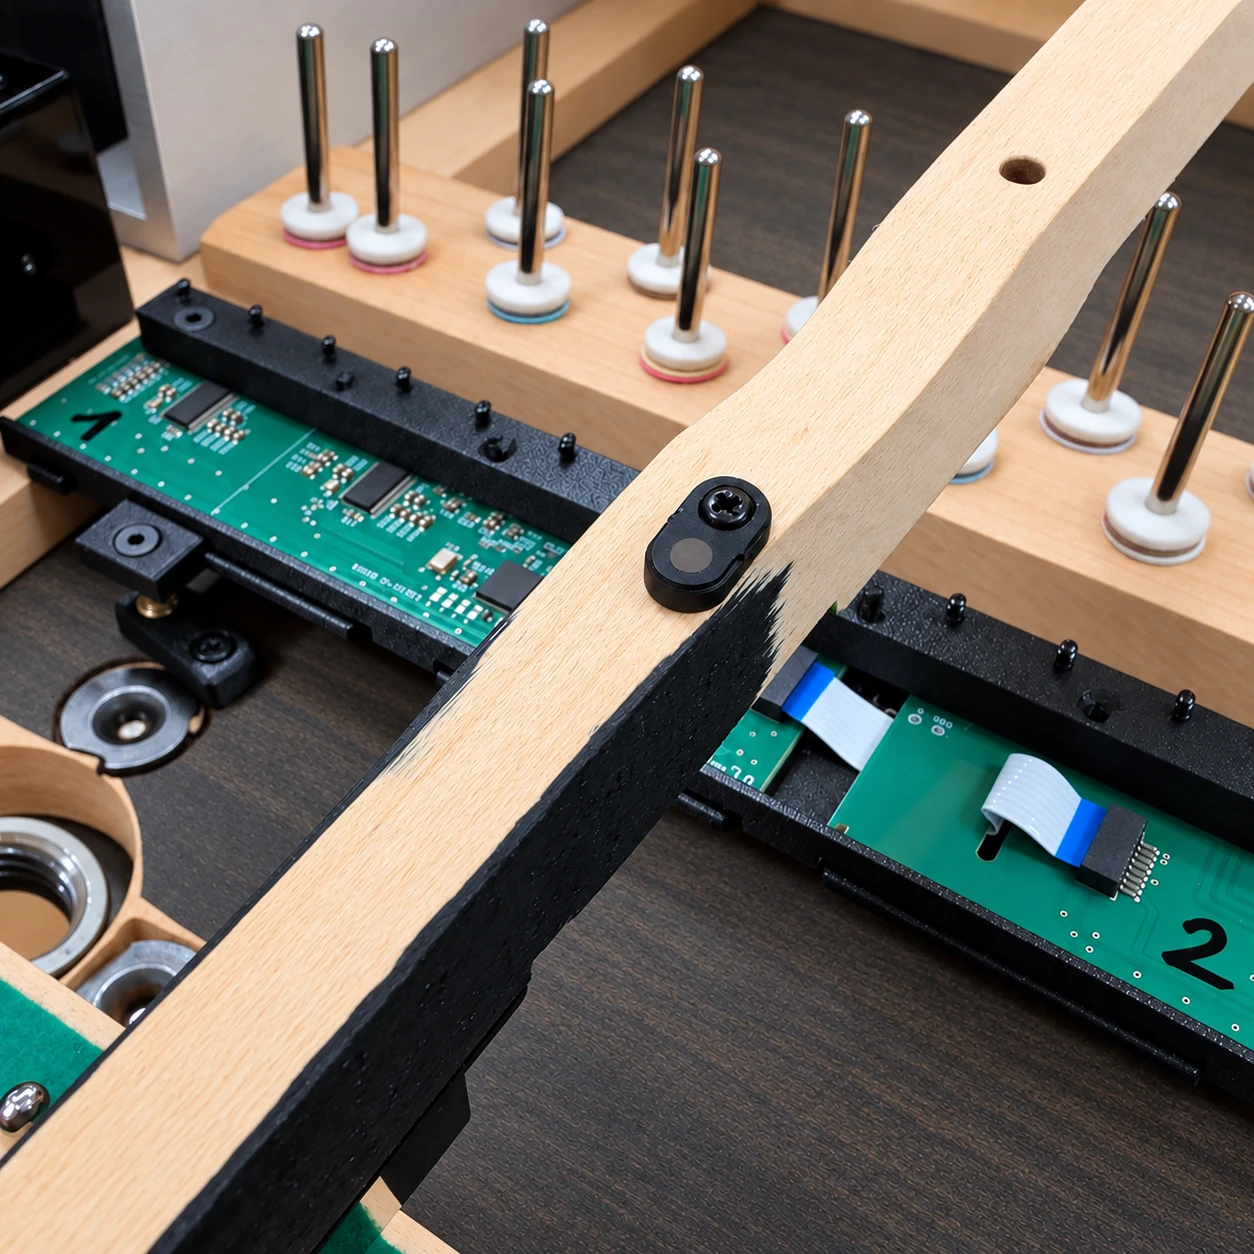
Check the sensorboard height with the reference keys
Once the magnets are fitted to all reference keys, put the keys back in their normal positions. Click Continue to open Rail position. Leave all reference keys released briefly so that their rest positions can be measured.
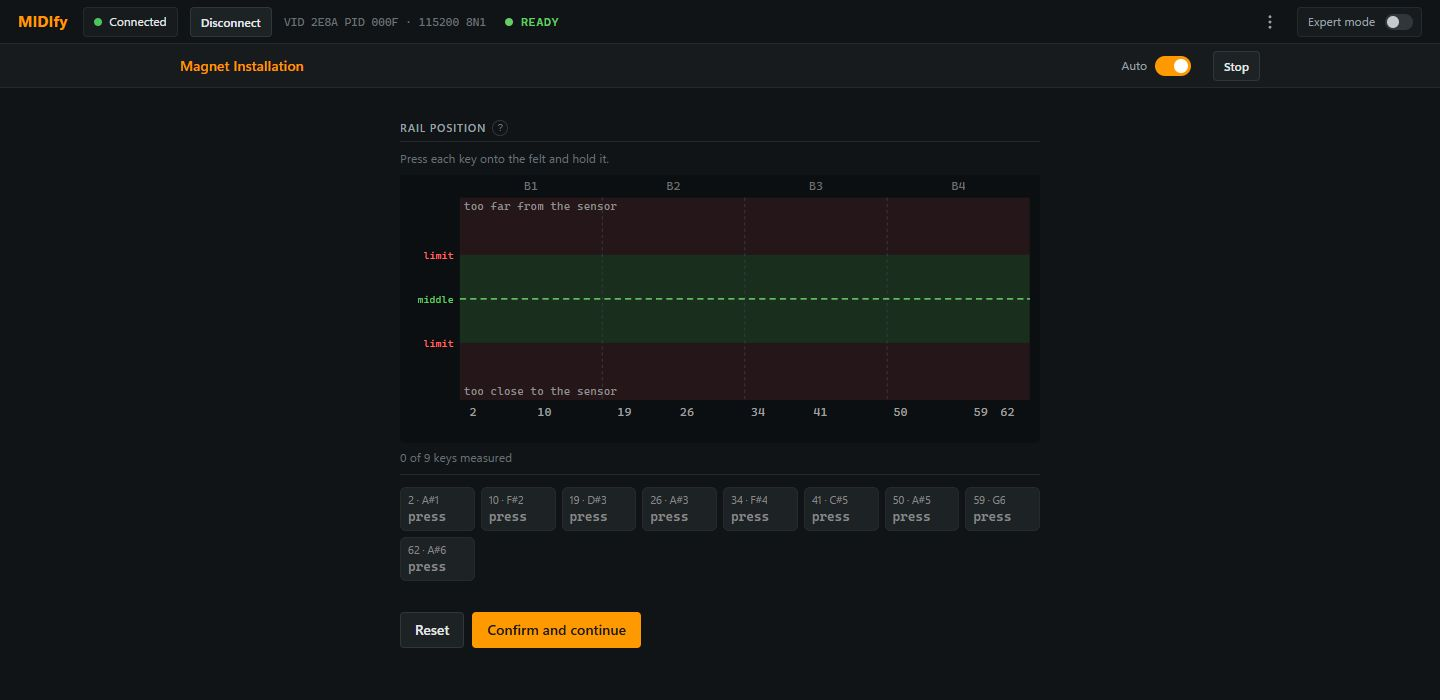
Press each reference key down without aftertouch and hold it briefly. The measurement is captured automatically.
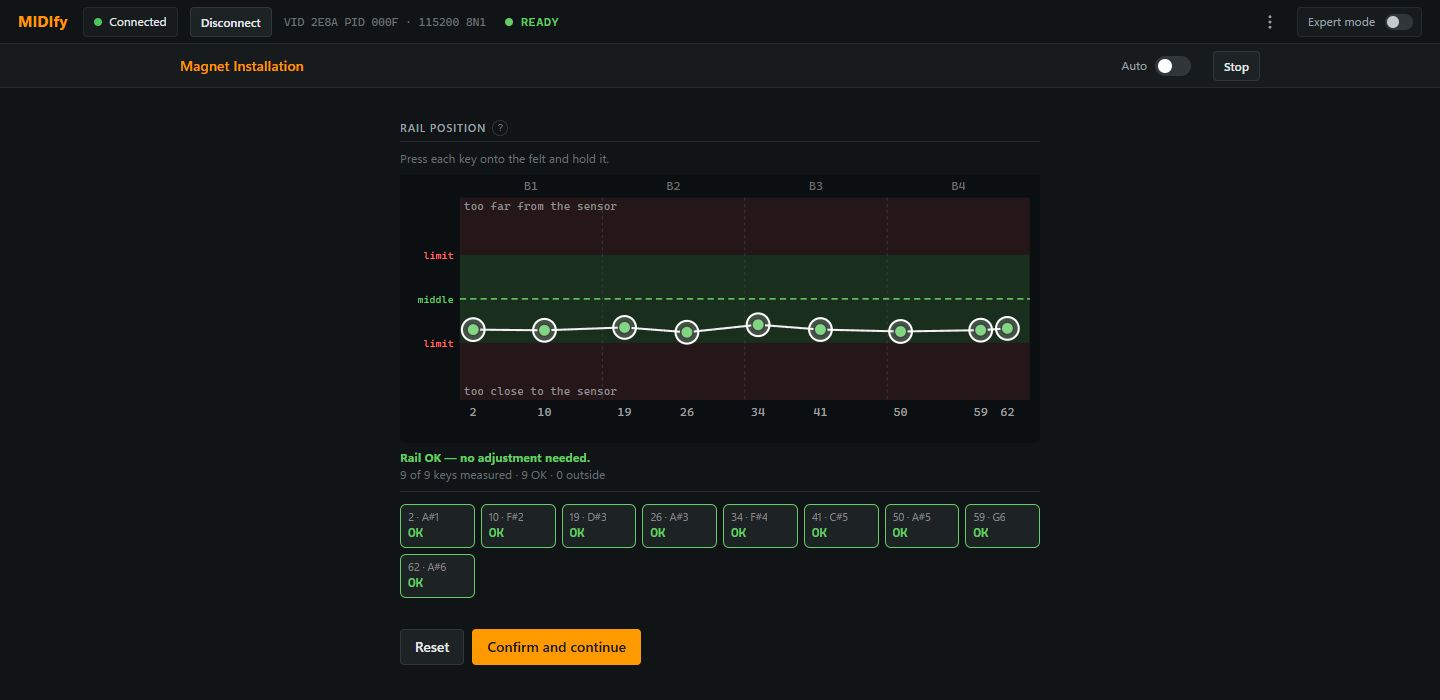
The graph shows each reference key's position within its usable range. A point above the green band means the magnet stays too far from the sensor; a point below it means the magnet comes too close. Green points and OK indicate a valid position. The points do not need to form a straight line.
Adjust the sensorboard height
Use the height-adjustment screws on the standoffs in the affected area. ▲ means raise the sensorboard; ▼ means lower it. Follow the adjustment amount shown by the wizard.
Release the reference key fully, then press it down and hold it again to take a new measurement. After changing the height, lift the affected reference keys out and put them back to reset their rest positions, then measure them again. Reset clears all reference-key measurements.
Prepare the remaining keys
Click Confirm and continue to start the Magnet Install Wizard.
Remove the reference keys and place the marking jig on the sensorboards again. Working one board at a time, mark all remaining keys and fit their magnet holders using the procedure above. The reference keys already have their magnets fitted.
Use white magnet holders for white keys and black magnet holders for black keys.
Complete the magnet installation for the entire keyboard before starting calibration. On a Wurlitzer, calibration begins at A1, the lowest note.
Calibrate the first key
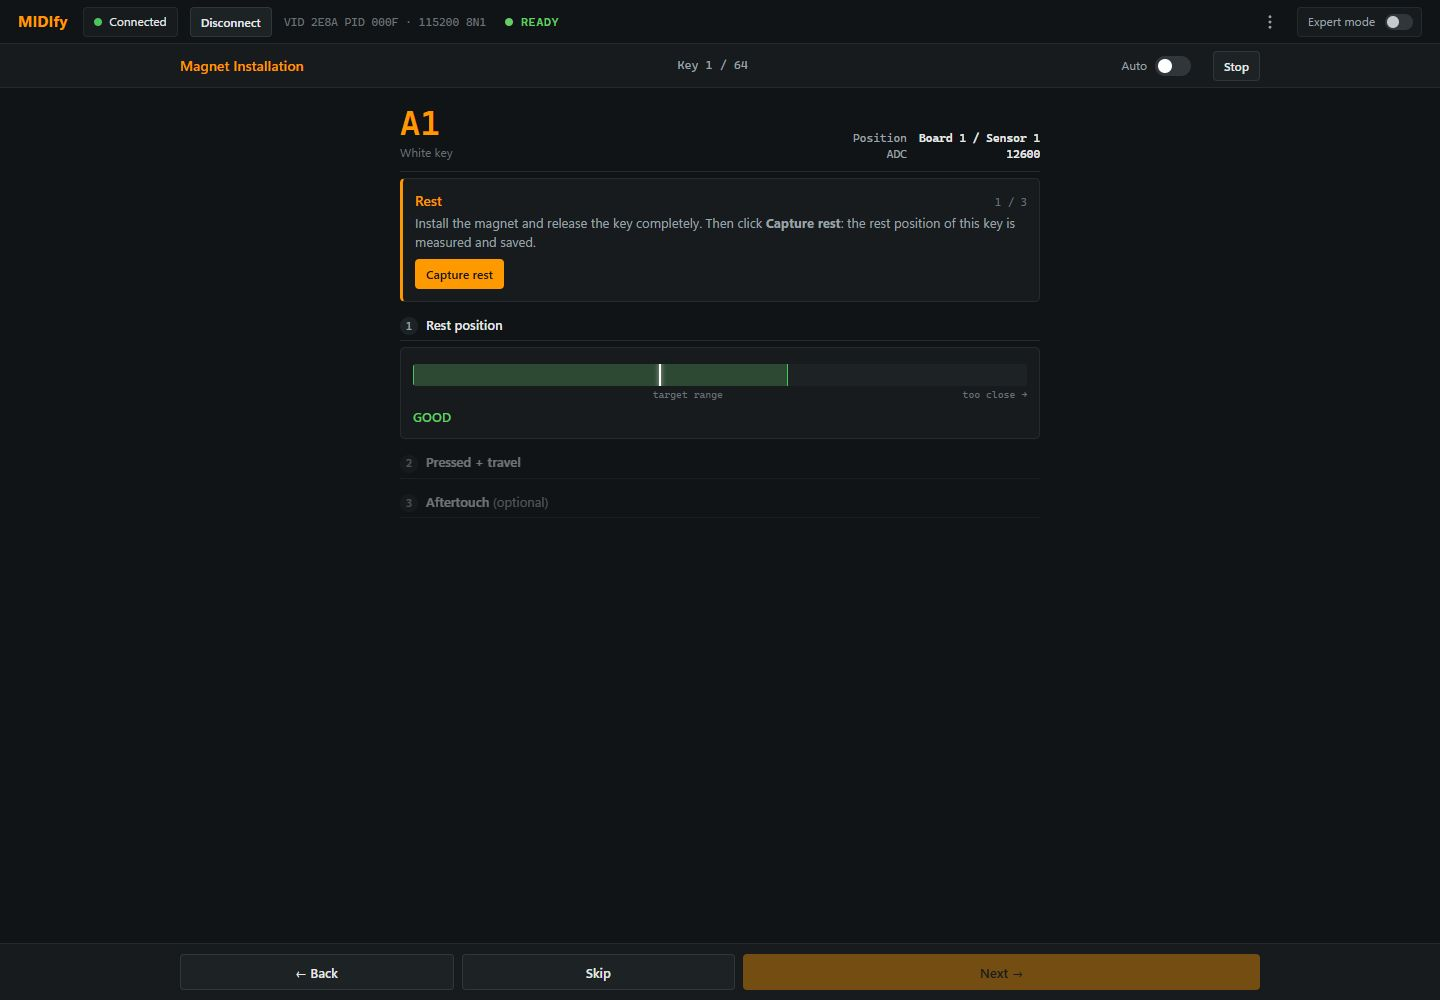
Calibration starts with A1, the lowest key of the Wurlitzer.
Release all keys, then click Capture Rest to record the rest position.
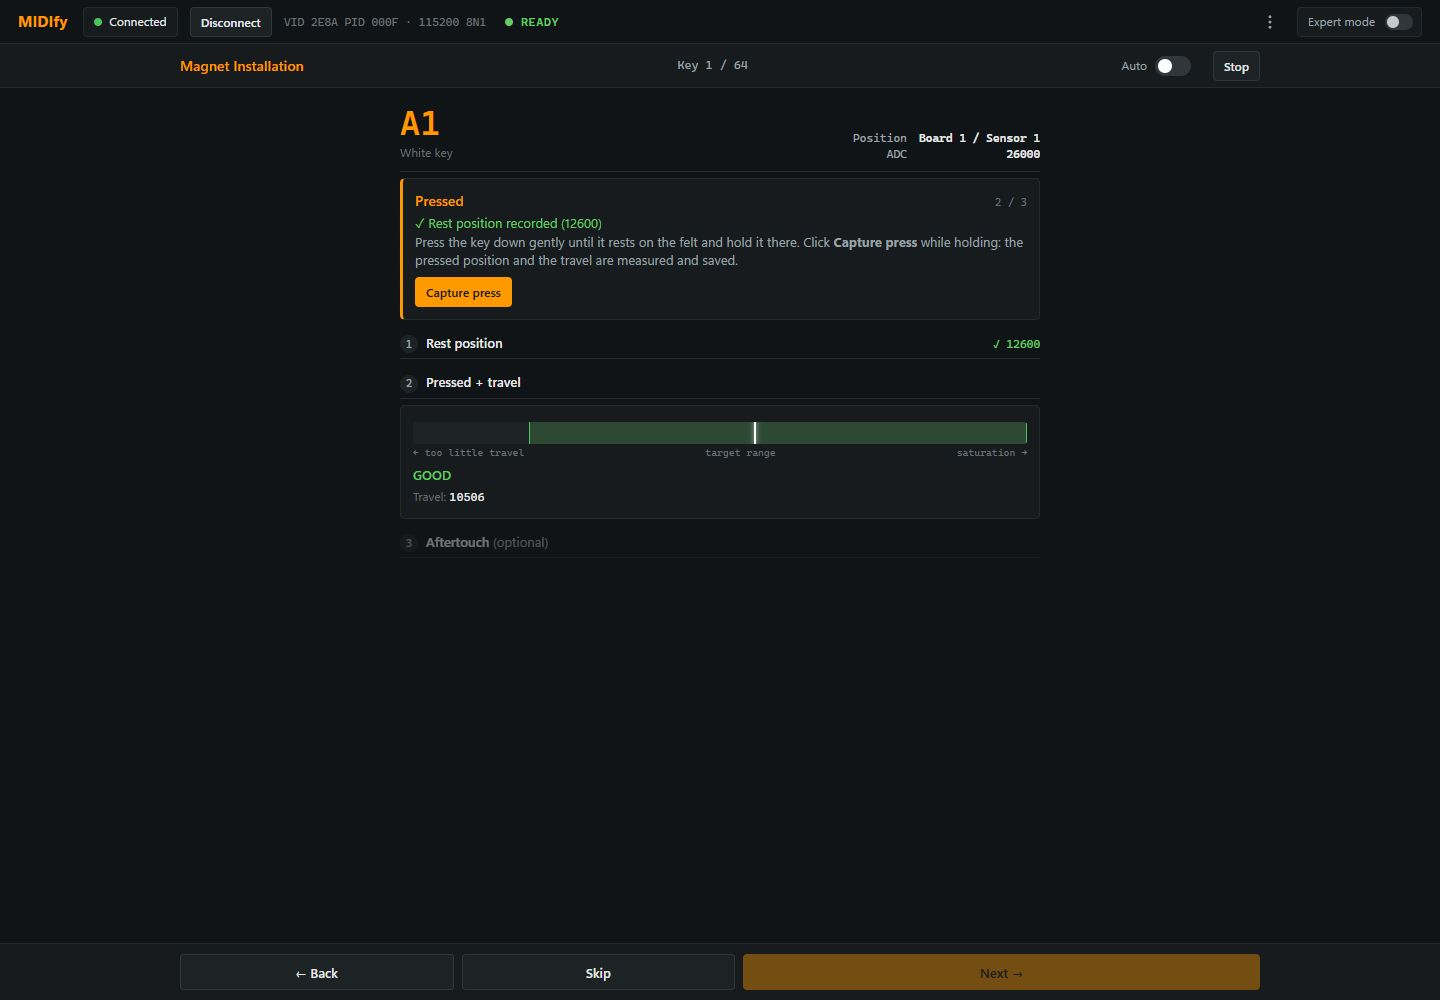
Press the selected key down until it just reaches the stop. Use the lightest pressure needed to reach this position, without pressing into the aftertouch range. Hold the key there and click Capture Press.
Press the key further into the felt until you reach what you consider maximum aftertouch. Hold this position and click Capture Aftertouch.
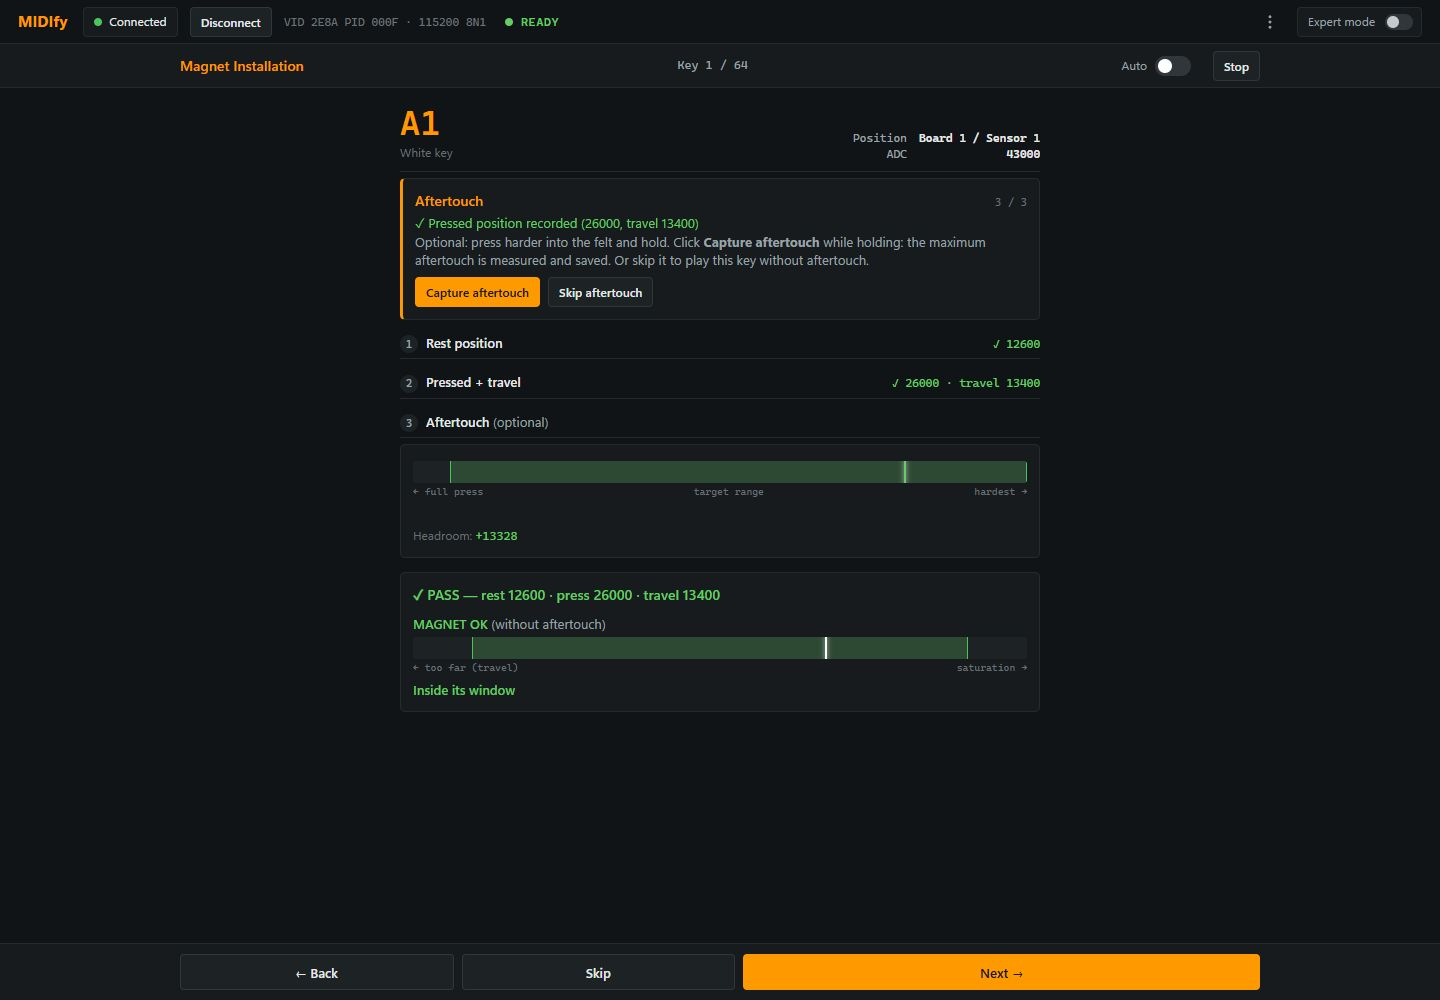
The first key is now calibrated.
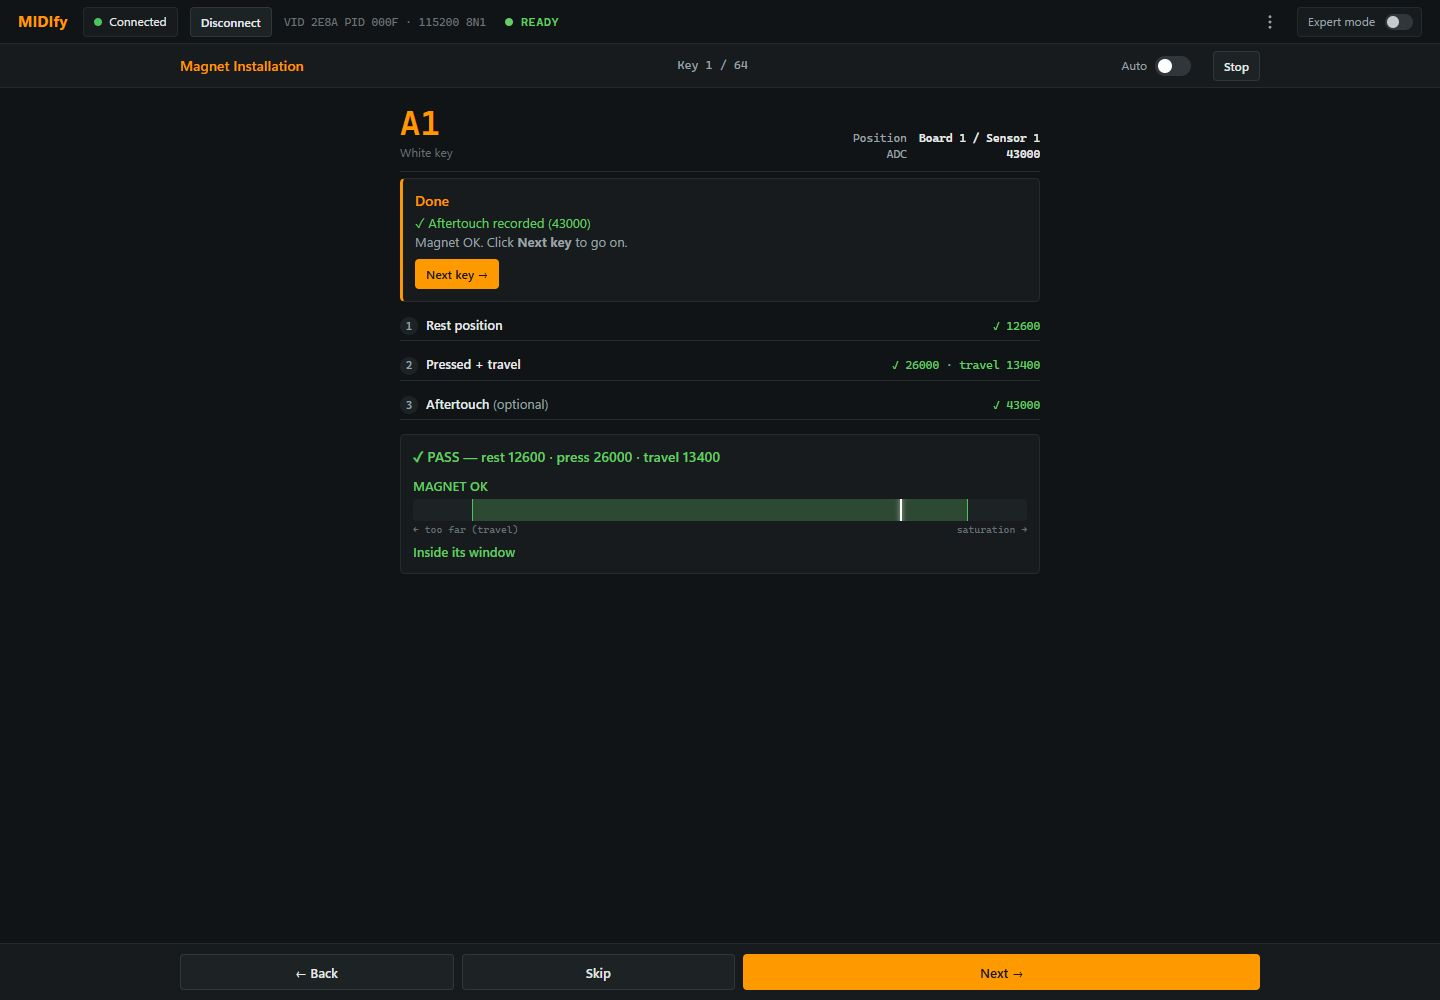
Calibrate the remaining keys
Click Next to move to the next key. Repeat the same rest, press and aftertouch measurements for every key.
Optional: Auto mode
For your first calibration, we recommend leaving Auto switched off. The automatic sequence moves quickly and can be difficult to follow until you are familiar with the procedure.
To use Auto mode, enable Auto at the top right of the wizard. For each key, release it completely, press it gently to the stop without aftertouch, then press further to your maximum aftertouch position. The wizard captures each position automatically, briefly confirms the result and advances to the next key.
Complete the key calibration
Once all keys have been calibrated, the instrument is ready to play and outputs MIDI.
The next step is to calibrate the sustain pedal. Open the Calibration tab and select Sustain Pedal.
Troubleshooting: magnet too close or too far away
If the wizard reports Key outside the target range, check whether it asks you to move the magnet closer to the sensor or further away. Click Adjust magnet, correct the installation as described below and measure the key again.
Magnet too far from the sensor
For both black and white keys, place thin paper punchings between the magnet holder and the underside of the key to bring the magnet closer to the sensor. Use paper punchings intended for piano key levelling; these are not provided. Adjust the thickness as needed and secure the holder again.
Magnet too close to the sensor
For a black key, lower the sensorboard locally using the standoffs to increase the distance from the sensor. The distance from the sensor cannot be increased further by adjusting the black holder.
For a white key, replace the white magnet holder with a black magnet holder. Add paper punchings beneath the holder as needed until the magnet is within the usable range.
After changing a holder or adding paper punchings, repeat the key calibration from Capture Rest. If you change the sensorboard height, recheck the reference keys and recalibrate the affected keys.
Calibrate the sustain pedal
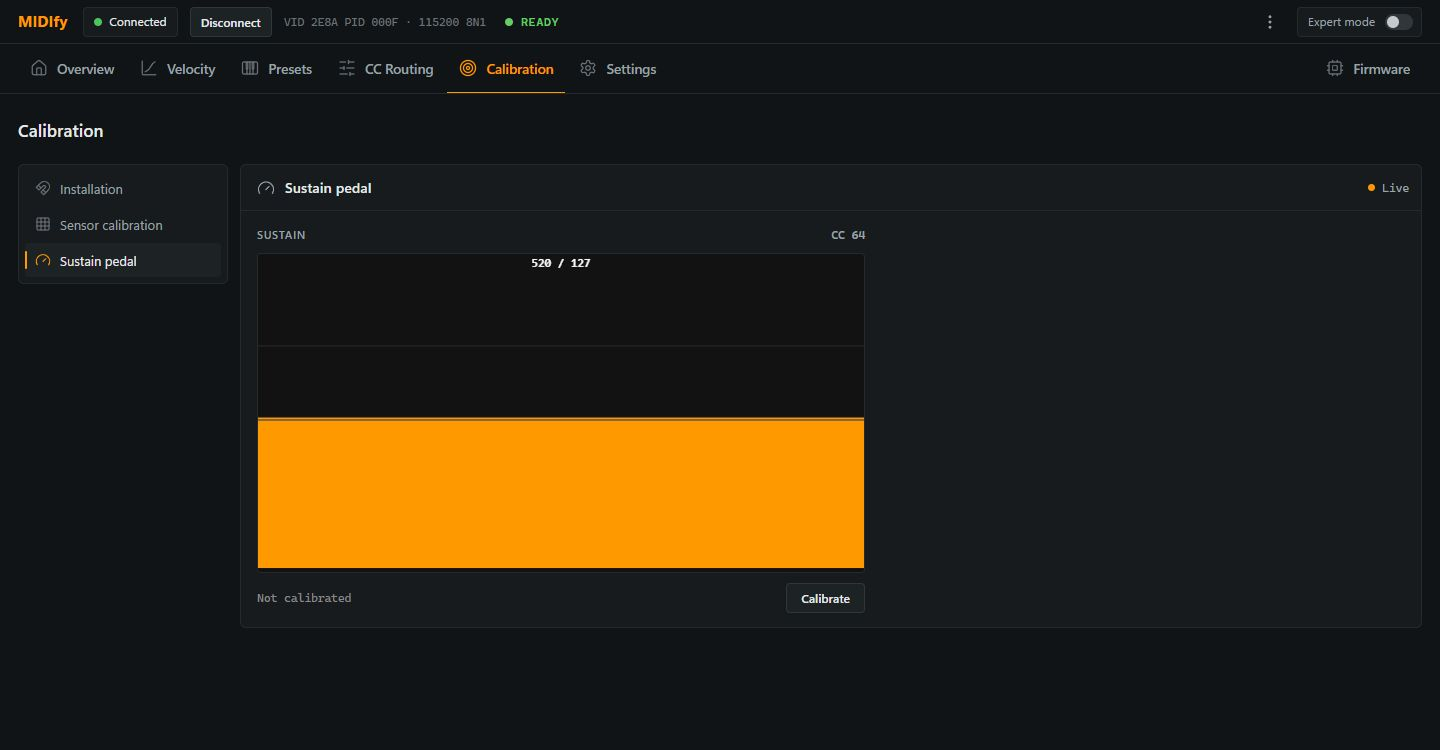
In Calibration → Sustain Pedal, click Calibrate and follow the instructions:
- Release the pedal completely, then click Capture.
- Press the pedal all the way down, hold it there and click Capture.
- Move the pedal to the position at which you want the MIDI command to be sent, hold it there and click Capture.
You can now fine-tune the switching threshold. Click Save to confirm.
You can readjust the trigger point at any time under Calibration → Sustain Pedal.
Fine-tune the velocity curve
Continue with Velocity to adjust the velocity curve to your playing style.